Needless to say, I have been working on some baby gifts. I do crochet and I have made a few baby blankets recently. I would say that I am a "simple" crochet-er, although I can follow easy patterns. Really, I don't have to patience (or the time?) to figure out difficult crochet patterns. It's like reading another language! Here is one of the blankets I made this summer:
I use a half-double crochet stitch and then add an edging...nothing too complicated!
I was also struck with inspiration fom a blog I love called Crazy Wonderful. It's full of great decor, DIY and mom posts. Shelley had made this super cute applique shirt for her daughter....
I thought it would be really cute to applique onto burp cloths and bibs. So, I picked up a square of fabric at the fabric store, along with some heat activated fusible paper (can't remember if that's the correct term?). I also had bought some plain burp cloths and bibs.
I cut out my shape, both the transfer paper and the fabric.
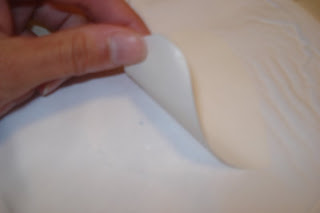
Once you iron on the fusible transfer paper, you peel off the paper and the sticky side is left behind.
Carefully line up your fabric cutout and lay it on the sticky side. Then, take your iron and use the medium setting with no steam to attach the fabric cutout. It will take a little bit of time to get it to fuse.
Since we know what baby's name will be, I chose to do an "S" on a bib and a burp cloth.
Although the fusible transfer paper will hold it together, it's best to run stitches around the edges to keep it secure. Especially for something baby-related....those bibs and burp cloths will take a beating.
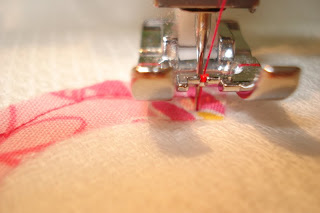
I chose a hot pink thread. I ran it around the edges of the fabric, keeping about 3/8" from the edge. If it's not totally perfect and even, it adds to the charm a bit.
If you're doing a shape with lots of curves like my "S," you'll want to make sure that you rotate the shape as you're sewing. It's best to stop with the needle in the down position, turn the whole fabric and continue. In the picture below, you can see a button in the upper-right corner....that is the button on my machine that keeps the needle down when you stop. (it's the first time I ever used that button!) To do the "S," I probably had to stop and rotate about 20 times.
Here is one of the burp cloths. I attached a strip of the fabric to the end.
Here are the two bibs and the two burp cloths I made.
I hope the new mom and dad like them! We can't wait to meet baby Sydney!
Linking to.....
Tip-Toe Thru Tuesday at Crayon Freckles
Potpourri Friday at 2805
Feathered Nest Friday at French Country Cottage
Simply Creations at Simple Home Life
Sunday Showcase at Under the Table and Dreaming
Project Parade at The DIY Showoff
Creative Bloggers' Party and Hop at Homemaker on a Dime


6 comments:
Maybe you should make Skyline bibs for all of us. We can take them and wear them when we go!
(Kidding. Or maybe not.)
You are a very talented gal: crocheting and sewing! The blanket is so cute and the bibs you made are precious! Lucky mommy and Sydney!
Thanks you for linking to Potpourri Friday and helping out in making it a success! I appreciate you!
how sweet
So cute! If you get a chance I would love you to link your bibs and burp cloths up to More the Merrier Monday. It starts tonight and lasts through Wednesday. See you there. http://diyhshp.blogspot.com/
How sweeet are these. My best friend just had a new grandson last night. Just love baby things.
Hugs,
Ellen
awww...so sweet! i love stitch-witchery! thanks for linking this up to my tip-toe thru tuesday party last week! hope to see you again this week!
andie @ http://crayonfreckles.blogspot.com
Post a Comment