Saturday, May 21, 2011

Finished family room....before and after

I consider myself to still be fairly new at this blogging thing and for all of the things I have posted, I have not done very many "before and after" posts. I did post the process of redoing my son's room (the very first room to be painted and finished in the house). You can check that out here if you are interested.

Now that I have a few rooms that are mostly dec'ed out, I thought I'd like to share them. Family room today.....office next week.

The catalyst for the room redo was the carpet....our new house had almost-white carpet. Between two kids and a dog, it got dirty so fast. We decided to have new carpet installed in that room. Since we had to take EVERYTHING out of the room, we thought it would be a good time to restart from scratch. So, we bought a new TV and went from there. Our new carpet is one of those new speckled and shaggy berbers and I love it because it hides everything.

So...here are some before pics of our living room. It is one big room, combined with the kitchen, separated by a counter/ledge. Unfortunately, I have no true before pictures....the only pictures I could dig up include people since all of the pics were taken before I started blogging. Just so you know, I now take pictures around the house and I get a look from my husband like, "You're taking a picture of that?"

Before....


So, the paint was a very neutral tan color and you can see in the first pic, our furniture that fit wonderfully in our old house looked squatty in our new house with higher ceilings. Also, our family room is a bit smaller than our old one, so the amount of floor space our old TV cabinet took up was eating up a lot of play space for the kids. In the second pic, you can see all of the boxes of shelves we had bought that were yet to be put together.

Here are a few "during" pictures as I finished up the kitchen painting. I like bold and saturated colors.


The kitchen had been a yellowy green color. Once I did the cutting-in, Fred commented..."I didn't know our kitchen was lime green?" I had doubted the paint color a little until it was all finished and now I love it.

When we were looking for ideas on how to configure our new room, we went to IKEA and walked around the showroom area. We had originally thought to get just a TV stand and do something else to fill in the wall space.....until we stopped in front of one room that had a wall of shelves that looked like built-ins. When Freddie said, "I love that," I thought BINGO! One reason we loved it so much was that we are both huge book-lovers and readers. We had books all over the house in different places, so it was appealing to have a place to keep all of the books together.

And here is the after....


We bought the Billy shelves from IKEA. They come in so many different sizes that you can find what fits your needs and space. We also used an extender-shelf that you fit onto the top of the tall shelf unit to add some more height. I also installed some lights to illuminate the center bridge piece over the TV, as well as some lights that stick out over the bookshelves that illuminate the shelves. They are on timers so they come on in the evening and turn themselves off.

We also sorted all of the books and arranged them in a systematic way. If you look at the top pic, you can also see a shelf that is tilted to show magazines. I love this about our new shelves. I'll snap a pic up close and post it later this week, along with a few other details about the room, including some pics of the lights on and what they look like.

We also had bought--along the way--a new coffee table, made new valances (see those here)and bought a new couch.  It did take us a while, but we are so happy.

Whew!


Friday, May 20, 2011

What's in bloom?

Woo hoo, am I excited for a nice weekend! We have finally reached the end of our rainy and chilly week here and this weekend is supposed to be beautiful and sunny. I had a dry day to plant some containers and take some pics of what is blooming right now.

My Knockout roses are showing their first blooms. I have two double pinks on each side of my front step.


Not fully opened, but lots of buds! Here is a plant that is new to me. I planted this last fall and it's a perennial...campanula. This variety is low-growing with small leaves and little purple flowers all over it.


And...I saved the showstopper for last! My clematis is in bloom on our lamppost. I am so happy to see it doing so well.....clematis needs a little time to get established and this is my plant's third year in our garden.


Have a great weekend!

Wednesday, May 18, 2011

Big boy room start-up

So.....what comes after the cutest nursery that you spent time putting together (and registering for)? A big boy or a big girl room. I've had it on the brain a bit, since our now 2 year old baby girl is getting to be a big girl and she's about to move down the hall. Next to the bathroom, away from right next to Mama and Daddy. 

And so it goes with my dear sister, Leah, and her oldest little guy. He graduated to a big boy room when #2 displaced him. ; ) He transitioned like a champ and when my sis saw the pics of my little big guy's room (check them out here), she asked me for some ideas and help for D's room.

Here are a few before shots...


We decided to go with a navy border at the bottom with a grass green stripe...after several paint samples on the wall. I am now officially a huge fan of the little 8oz paint samples, since we changed our minds on one of the colors. Three of the upper walls are light blue and the accent wall is orange above the green/navy.

In process....you can see the samples on the wall. The green on the wall turned out to be a litte too lime-colored, as you will see. I measured around the room with pencil marks and lined up the tape. In the past, I have used a laser level and did not have anyone to hold it (usually my helper husband)....so I used a tape measure and a pencil.


The green tape you see is called Frog Tape and it was awesome! Easily the cleanest lines I ever had when doing a project like this. I highly recommend it.


After painting up to the edge of the Frog Tape, I let it dry and pulled up the tape. I thought I'd have to continue the project another day....I did do all of this in one day, about 7 hours! But...I was able to add the blue painter's tape (I cannot remember the brand offhand) and put it on over the painted edges and lined up on the line....


Then, I added the green. I was really worried the blue tape would pull up the previous paint (especially without overnight dry time--or three days of curing as the tape recommended), but it worked like a charm!


Now that it's done, I can't decide which color I like the most! It's definitely a punch of color and most definitely fits the inhabitant...my sweet little nephew.

More to come on this project....
It's a great room and they had some beautiful valances, plus some really cool prints on the wall that we used for some color inspiration. I'll post some pics of the prints later on.

Sunday, May 15, 2011

Mirror, mirror on the wall

For some reason, I seem to have been obsessed with mirrors lately....I have spent a lot of time looking at mirrors in stores and on Craigslist. I had a successful mirror redo with this baby...


I've got an art idea for the surrounding area that will materialize most likely once school is out for the summer...

And...we repainted the hall bath upstairs and took down the sheet mirror (which I donated to the ReStore). Well, I have not been able to decide on a replacement. As you can see, I took this pic in January and still we have no mirror.


I kind of like a simple white wood frame, but they have these really cool mirrors with a natural wood, bleached look at HomeGoods that I keep coming back to....I should probably just buy one.

Finally, here is a mirror for the dining room that I bought off Craigslist:


This mirror is huge. I almost could not get it in my car to come home. I bought it in March and it sat on the dining room table until mid-April. It did get some new paint then. First, I sanded it down with a sanding block.


I tried first to use one of those little samples of paint from the hardware store, but the color the paint guy chose didn't match my spray paint. So, I ended up doing two coats of flat paint, then a coat or two of spray paint.


I really like the detail at the top! And the finished product...


I've got some other things to do in that room to tie in the grey and yellow, along with some other projects brewing.

I had a busy weekend here, but so much fun and I will have lots to share this week.  : )

The DIY Show Off


[image[7].png]

Wednesday, May 11, 2011

What's in bloom?

Well, here we are, with another edition of the flowers showing off in the garden currently. I'm super excited about gardening here...we are only a week or so away from the frost free date here in zone 6a! This weekend, along with some room redo for my sister, I am planning to hit the Early Bird sale at our local garden center. They open from 7-9am and you get to take 20% off your entire purchase. I go every year and buy most of my annuals for the season. I love it--you walk in and they have fresh, hot coffee and donuts at the door. I'll snap some pics of some great plants I see there this Saturday...and I'll be sure to share pics of the room redo as well!

On to some of the stars...first up is a pic of the blooms on one of my catmint plant--Nepeta 'Walker's Low.'


This plant is a perennial that blooms nearly the entire growing season with pretty purple flowers. It spreads out wide, so give it room. The foliage is a nice dark green with a bit of silver to it.

Next up, a bloom from my chives. The blooms are really nice...and they are actually edible, also. You can put them in salads for visual interest


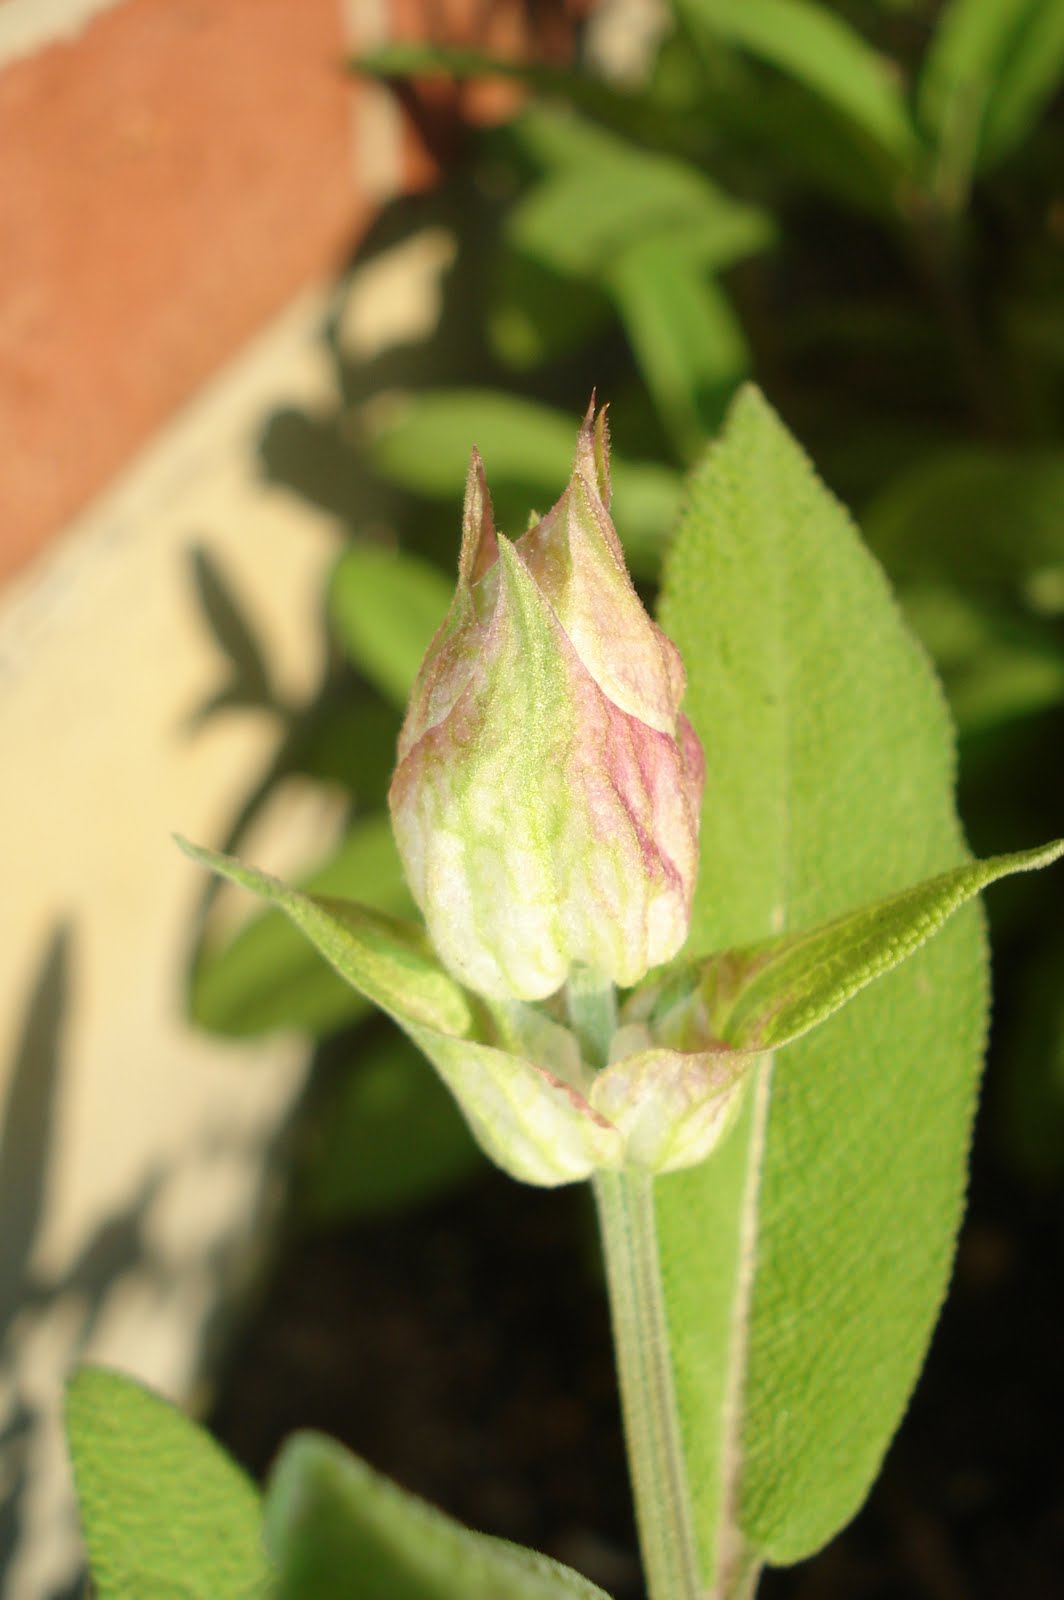
I also spotted a few blooms from my sage plant. To be honest, I don't think I've ever seen sage bloom before! It's kind of structural with a pinkish tint.


Last, one of my favorites....perennial geranium. The blooms on these plants are just gorgeous and they have a long bloom time during the summer. The color is really saturated and the veining in the blooms is so cool.


Have a great day!

Tuesday, May 10, 2011

Mother's Day pretties

This weekend, my helper and I put together some small planters for the moms in our lives. It was such a special day...since Charlie is five, he is way into making wonderful things!

We started with these...picked out specially for each mom.


And these:


The best part? Using a hammer and a nail to punch the holes out.


Charlie chose a ribbon to go with each flower. They made a nice centerpiece:


This particular flower was really cool! There is a new petunia out this year called 'Black Velvet' and the garden store was out of that one....but they had this one, called 'Pinstripe.'


And I got these....


Saturday, May 7, 2011

Busy bee

May....one of my favorite months of the year, along with April. The landscapes look beautiful and everything is so fresh and green.

It also happens to be one of the busiest months of the year when you're both teachers...; ) Plus, this is Charlie's first year playing t-ball, so we have added that to our calendar!


I have been working on a few house projects, but nothing I'm ready to share quite yet. I have managed to get a few spring cleaning projects done. I cleaned out our closet and put away all of our mittens and winter hats.


It is so wonderful to finally put all of those bulky things away for the warmer months. I replaced them with summer shoes and lighter sweatshirts for the kids, as well as my summer hats....


I also find it handy to keep things like sunscreen there for when we are running out the door during the summer!
I also managed to find a dry day last weekend--we had 13 inches of rain in April--to get our windows washed. While I am not sure anyone would say cleaning is their favorite activity, this is one of my favorites to have done. The windows look so good when you are finished!


Happy Mother's Day to all of the moms out there!